Building a blog in 2019
After practicing to write daily for the past 5 years, I decided to start a blog in 2019. I resisted the temptation of choosing a platform and instantly deploying a new blog. Instead, I started unpacking my idea of ‘starting a blog’ to better understand my needs and motivation.
The design process used for this project consists of three phases: understanding, planning, and building.
Understanding
This phase consumed the most amount of time. Until I discovered the true motivation and need for this blog, I repeatedly answered three seemingly simple questions:
Why do I need this blog?
Share my writing and showcase projects.
Who is this blog for?
Readers interested in design process.
What can users do on this blog?
Read posts, leave comments and contact me.
Planning
After all the heavy lifting in the previous stage, this stage was relatively simple. However, I still had to resist the urge of making platform and design related decisions.
Requirements
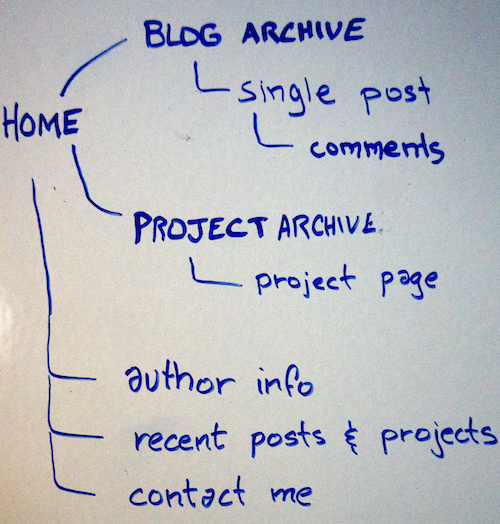
Learning from phase one, I was able determine what pages I needed for the blog:
- blog archive
- single post
- comments section
- project archive
- project page
- contact
- author info
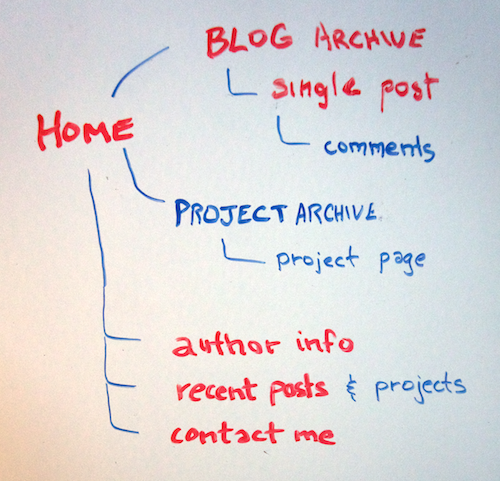
Sitemap
I grouped requirements and structured a sitemap to best match user mental models of a blog:

Building
I knew what I needed, and why. Focused on who I was building for, I could now start the visual design process. Resisting platform decisions was much easier.
Design
Focused on a clutter free reading experience for my readers, I drew inspiration from Firefox Reader View. Starting with a mobile-first approach:
- Wire-framed sitemap pages using pen and paper.
- Mocked-up html/css using wireframes as blueprints.
- Guerrilla usability tested mockup prototype.
Platform
A clutter-free reading experience for users was a top design priority. A self-hosted site was the best option to have control over the user experience:
- Jekyll - I decided to use this static site generator, running on the Ruby programming language. This tutorial by Tania, saved me countless hours!
- Learning Ruby - I skimmed through tutorials, browsed forums, and focused on learning only what I needed to get the job done.
- Learning Git - To track changes and manage source code and I had to learn git. The entire code for this website is available on GitHub.
Launch
The first release cycle is focused on releasing crucial components:

- Host: Netlify
- Workflow: Local changes are pushed to GitHub. Netlify detects changes and deploys a new build.
- Development: Modified scrum framework to manage development cycles.
Conclusion
It helped to have previous front-end development experience. However, it has been incredibly challenging and fun to work on this project. Things I thought of as trivial in the past, are now becoming acquired skills.